Facebook Live Stream link: https://www.facebook.com/seoinnovator/videos/10223741183309238/
This is only available for the paid plan which you can edit the workflow.
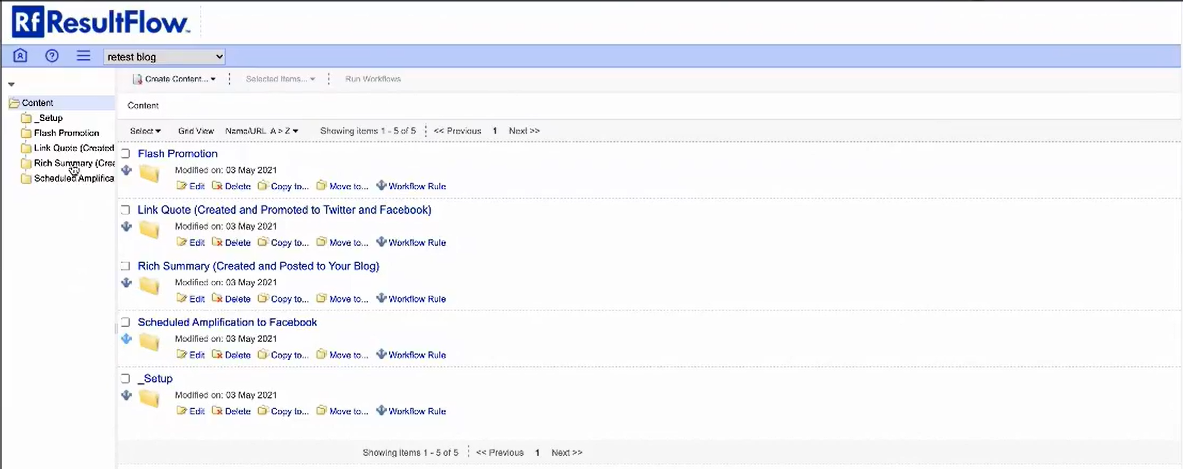
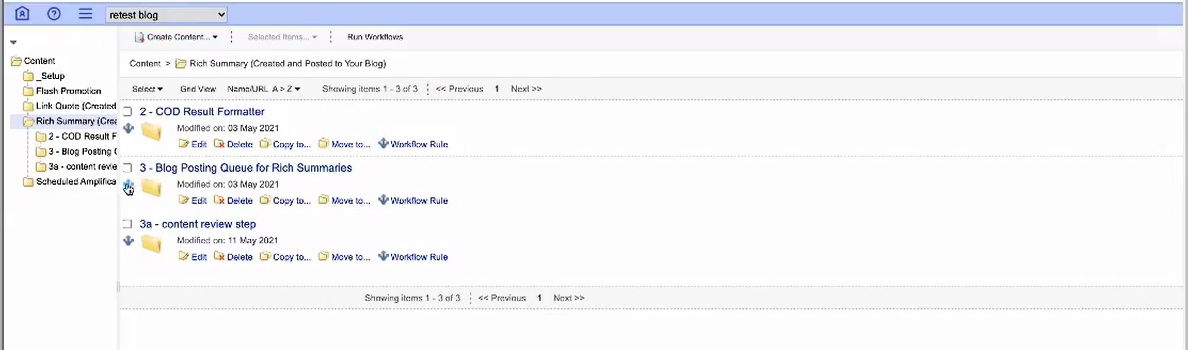
Go to the hamburger menu → Explorer. Click on Rich Summary.
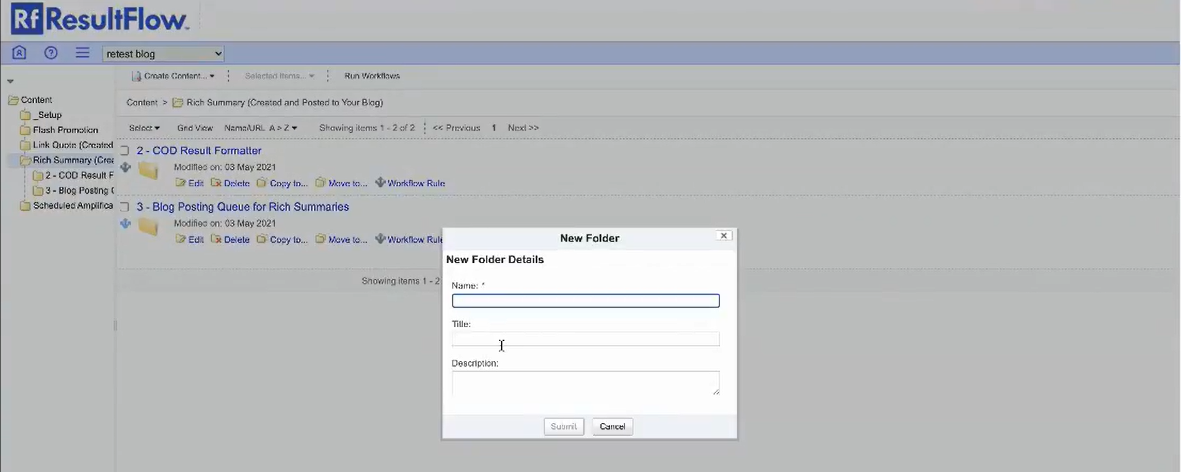
Click on Create Content → New Folder. This is the review step. We will not send the post to the blog until it is reviewed.

Type the name of the folder, example: 3a Content Review Step. Then click Submit.
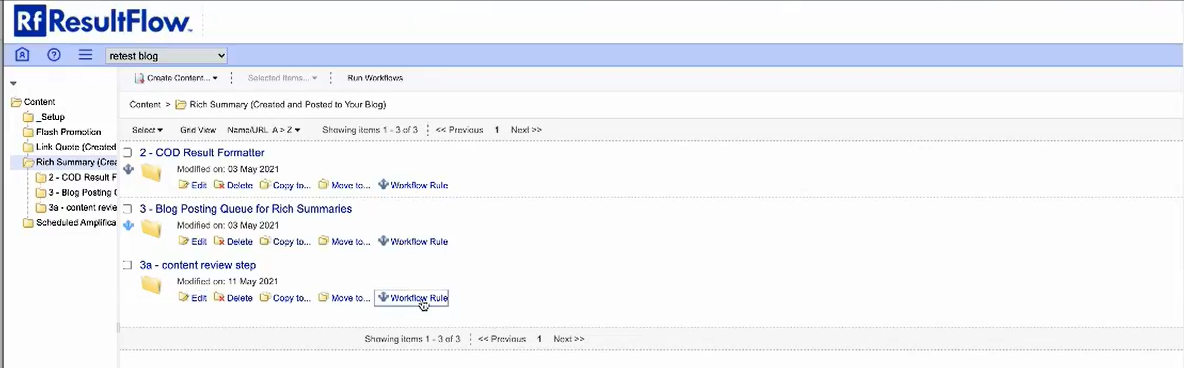
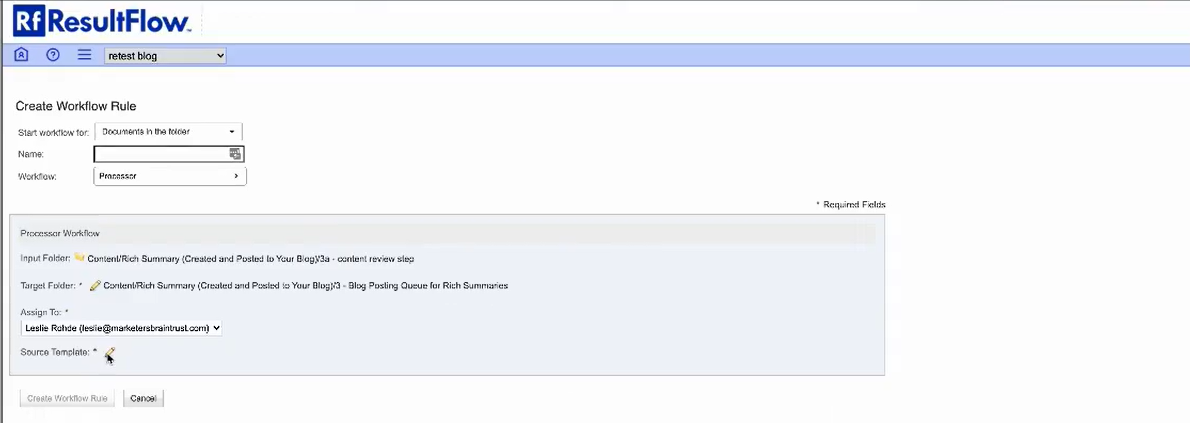
On the newly created folder, click the Workflow Rule.
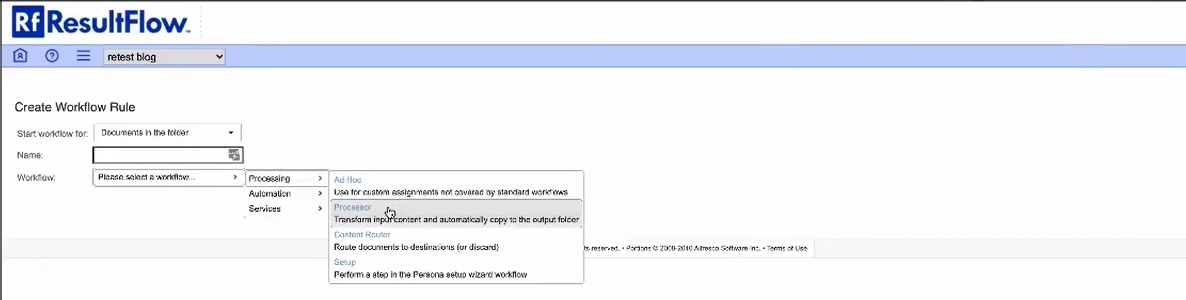
Start Workflow for: Documents in the folder
Workflow: Processing → Processor
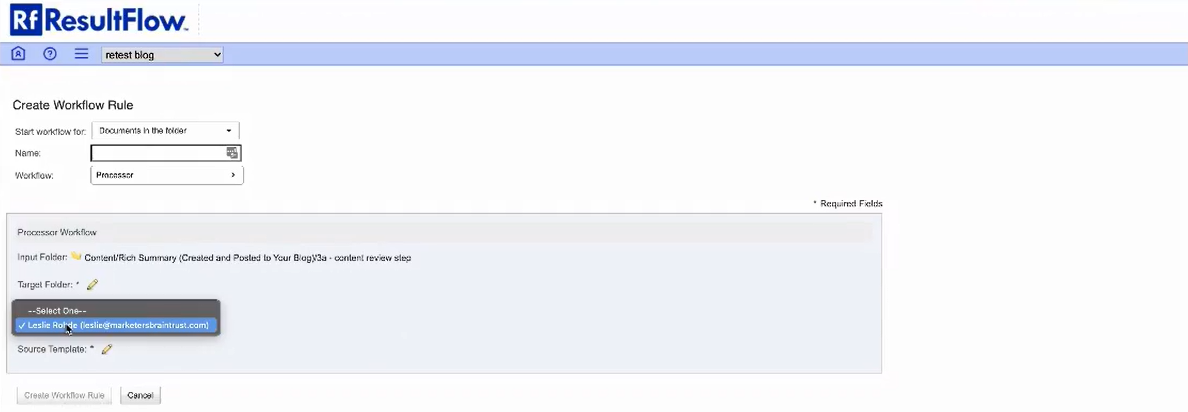
The processor is just a set of instructions that is given to an assignee.
Click Assign To and choose the assignee, in this example, Leslie Rohde.
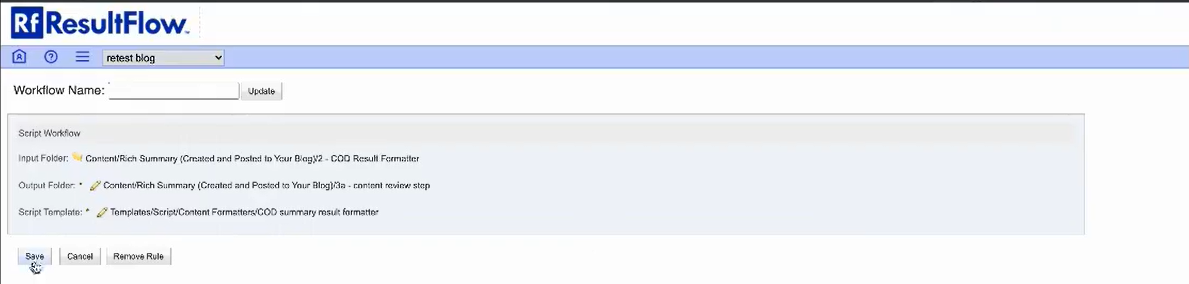
Click the pencil icon in the Target Folder. Click Content.
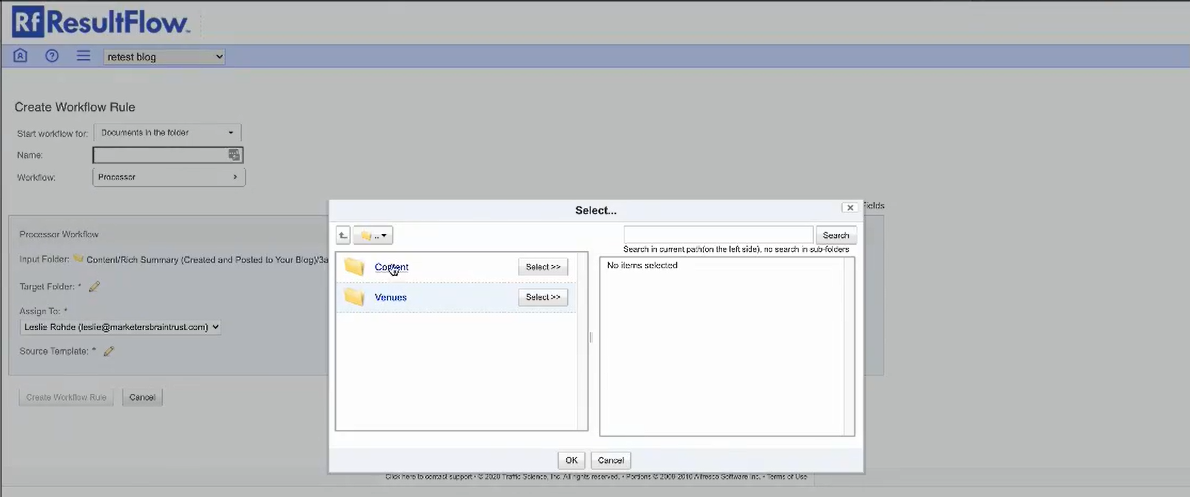
Click on Rich Summary (Created and Posted to Your Blog)

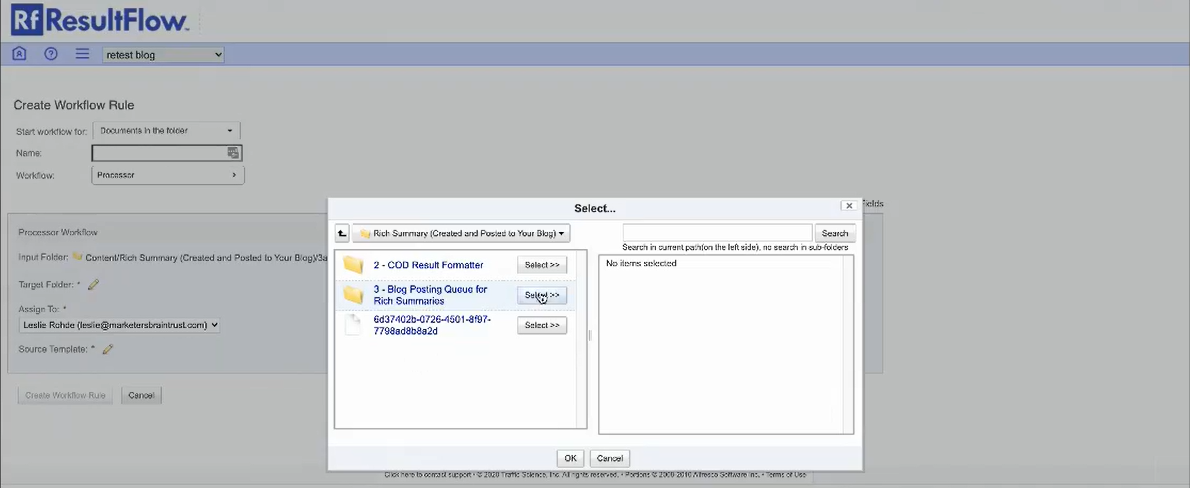
Click Select on 3 - Blog Posting Queue For Rich Summaries. Then click OK. We’re inserting this in the workflow process.
Please contact mail support if you reach this setup to configure the Source Template.
Click Create Workflow Rule.

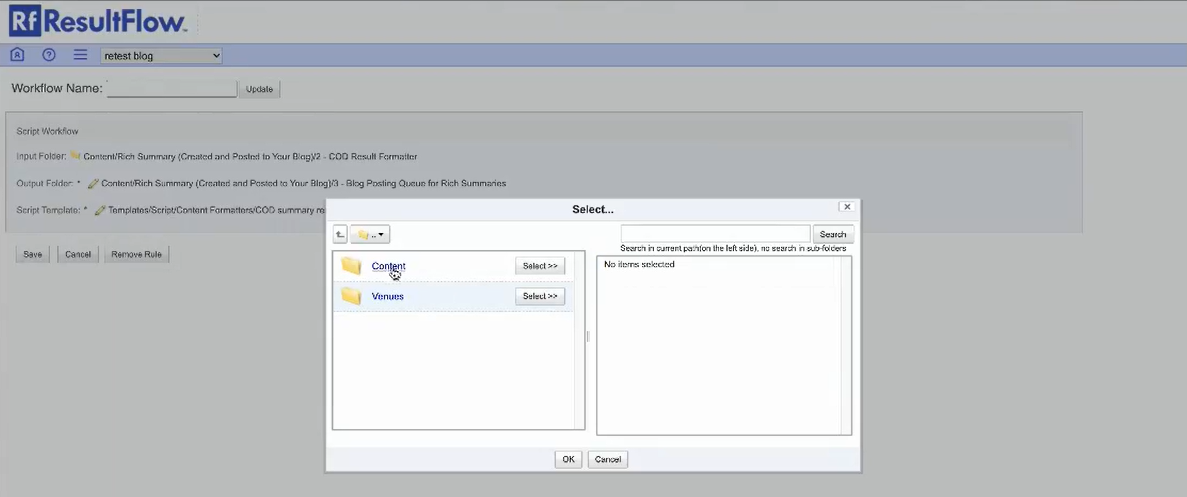
Then we need to rewire the steps before. Click the workflow icon in 3 - Blog Posting Queue For Rich Summaries.
Click the pencil icon in the Output folder. Click x - to remove the existing folder in the right side box.

Click on Content.
Click on Rich Summary (Created and Posted to Your Blog).
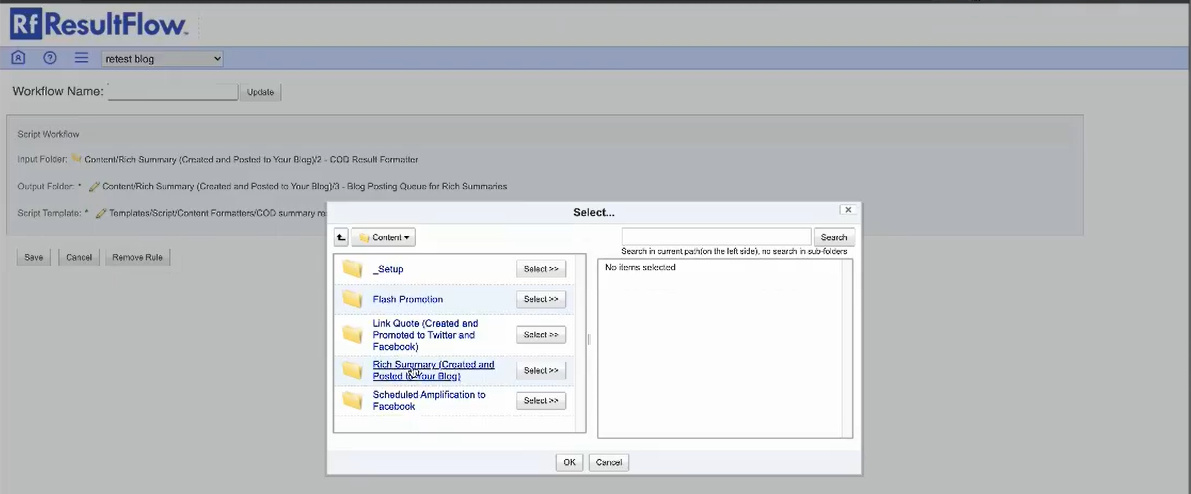
Click Select on 3a - Content Review Step. Then click OK.

Click Save.